I have never heard of David Gibble in the past until he called
me. I soon found out that Dave was a pretty sharp guy and
that we both had allot of the same interests. During our conversation
He dropped a bombshell on me when he told me years ago he
built a rocket belt and flew it un tethered. He just did it
there was no fan fair he told very few people.and he went
on with his life.My hat goes off to David for sharing this
historic event with us.
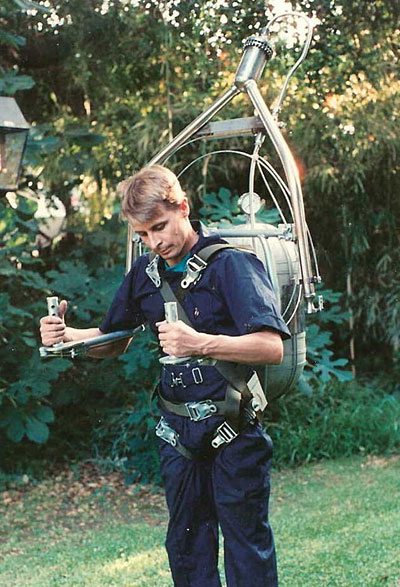
These hang tests gave me the confidence (or stupidity - take
your pick) to try my first test flight without a tether. This
was a very difficult decision to make at the time. I was a
young father and husband! I made this decision in part because
I have several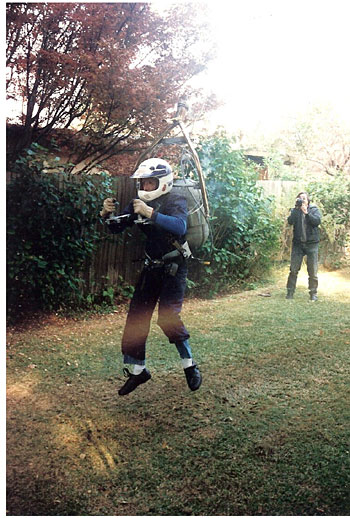 videos of Kinnie Gibsons' very first training flights and
they show the tether actually causing an upset to the man-machine
system once airborne. So, between those videos, and the 'lift-transition'
training, I decided to make my first flight test untethered.
videos of Kinnie Gibsons' very first training flights and
they show the tether actually causing an upset to the man-machine
system once airborne. So, between those videos, and the 'lift-transition'
training, I decided to make my first flight test untethered.
I first started the project in 1988, working mostly to develop
methods to produce 92% HTP, and testing small peroxide thrusters.
I started building the belt in '93, and that first attempted
flight test was made in the summer of '94. I can't call it
an actual flight because total thrust was about or slightly
less than gross weight, so I just kind of bunny hopped or
drifted around on the ground. Here's what happened: I had
enough fuel onboard calculated to give twelve seconds operation
at full power. After reviewing the post-test flight video,
I realized the fuel ran for about 26 seconds, and that I had
a serious flow restriction somewhere. I went back and re-checked
everything (I had already flow-tested the throttle valve and
rocket motor so I was pretty certain they weren't at fault).
When I mic'ed the off-the-shelf fuel line, the I.D. turned
out to be about 25% smaller than what the manufacturer claimed.
I replaced the line with a much larger I.D. one, and rechecked
flow through the entire system. I then readied the belt for
another test.
It had taken me two weeks of full-time preparation to get
ready for that first test (making, assaying and mixing fuel,
etc.), and I never got around to taking another two weeks
off work just for the purpose of another test before I wound
up selling the entire project to Tom Edelston.
Hydrogen Peroxide preparation
I distilled the peroxide from 50% feedstock.
It was imperative to use a vacuum fraction process that DID
NOT allow the stabilizers to distill over, otherwise they
would become concentrated along with the peroxide. I have
all the temperatures, times, flowrates, vacuum levels, etc.
in my notes.
It was also imperative to avoid an explosive vapor condition
(concentration vs. temperature vs. pressure) in the process.
This is done by working in a region of the temperature-pressure-concentration
curve outside the explosive limits. I have all this data as
well, and it is a documented part of my process. The explosive
limits were established by a group working for the military
at Frankford arsenal. [I have the tech docs.]
Also, it is not possible, or rather it is very difficult,
to distill the peroxide to the exact desired concentration
in a batch process. Although my process could be operated
continuosly, but I didn't want to handle large quantities
at a time. Therefore, the best way is to produce peroxide
of an exact concentration, is to produce a concentration HIGHER
than required, ASSAY it very accurately, and then back-dilute
it with 50% peroxide to the final required strength.
For my rocketbelt, I chose 92% as the final desired concentration
for use in my motor. This choice was not trivial. Most people
know that lower concentrations produce less power, and most
people know that higher concentrations decompose at higher
temperature. I assume that most people have a copy of the
decomposition temperature versus concentration curve for peroxide.
However, what very few people know (or knew back when I was
doing this) is that the melting point of Silver changes as
a function of Oxygen fugacity. This means that while Silver,
like all other Elements, has a definite and constant melting
point under STP conditions, the melting point becomes depressed
in a high partial pressure of Oxygen! And when peroxide decomposes
it produces a lot of Oxygen. Therefore, if you were to look
at the normal decomposition temperature of 94~96% peroxide*,
it would be just above the normal, published melting point
of Silver. Yet in fact, in a high concentration of Oxygen
the melting point of Silver is actually lower than this decomposition
temperature and thus can lead to either melting or excessive
erosion of the catalyst pack. [*I have the actual numbers
for m.p. depression and decomp. temps. in my notes - 94-96%
is my best recollection right now]. Therefore, I chose a concentration
of 92% so as to always be below this deperessed m.p. value
for Silver. I also found a way to make inexpensive but very
effective and long-lived catalyst screens that did not require
solid Silver wire, but rather electrodeposited silver on another
substrate. The manner and type of deposition was very important
- I did this work myself - normal "Silverplating"
like a plating shop would do was almost useless. Again, I
found 92% to be very compatible with the screens I made.
In order to make exactly 92% peroxide, I needed a way to very
accurately assay the distillate to know what the exact concentration
was. I have a lab procedure using chemical analysis that gives
a very accurate result - far better than gravimetric assay,
or boiling point determination. I produced a written document
that very accurately describes this process, as well as the
calculations required to perform the back dilution. (About
12 pages, if I recall...still haven't found everything...)
As I said on the phone, I always used two or three fractionation
stages to get from 55% to ~94%. Two stages will work, but
the process rate is much slower. Some of my early stills would
make about 500ml per hour. Not very fast. The rate limiting
factor was the rate at which I could flash vaporise peroxide
feedstock into the still (which still remaining in the safe
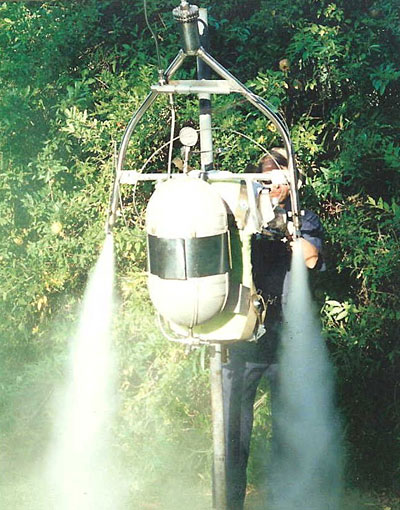
temperature / pressure envelope). That's why I built the wiped
film evaporator shown in the picture I sent you earlier. I've
built at least six stills; four glass and two from stainless
steel. I've had two explosions, both with glass stills and
both due to failures of the glassware under vaccum. The glass
imploded, and then the peroxide vapor, since it was no longer
within the safe pressure envelope, exploded. - instantly.
This is why my last two stills were stainless steel. I've
had no problems with them, and made more peroxide with them
than all the others (although the yield was slightly less).
I have a seventh that I started but never completed. It was
to be the largest yet. I still have the components for it...but
as I said over the phone I dumped the last of my 50% peroxide
a couple of years back. Years ago I also started on some equipment
(also unfinished) for the electrolytic production of peroxide,
Finally, I did not restabilize my peroxide. I thought about
it, but I decided against it. I kept it very clean, very pure,
and did not store it for long. Pretty much always made it
just before use. I do have some data however on which stabilizers
are safe to use, and which are not (they will 'poison' the
Silver catalyst), and the concentrations required.